How to Edit Like MrBeast With AI: Fast Cuts, Zooms, Sound Effects and Music
How to edit like MrBeast with AI: the 5 ingredients of the style (pace, zooms, sound effects, music, captions) and how to apply them in one click.
The short answer: the MrBeast-style edit is five habits stacked together, and AI can apply all of them to your own recording.
- Upload your video on the Media page and choose Auto edit.
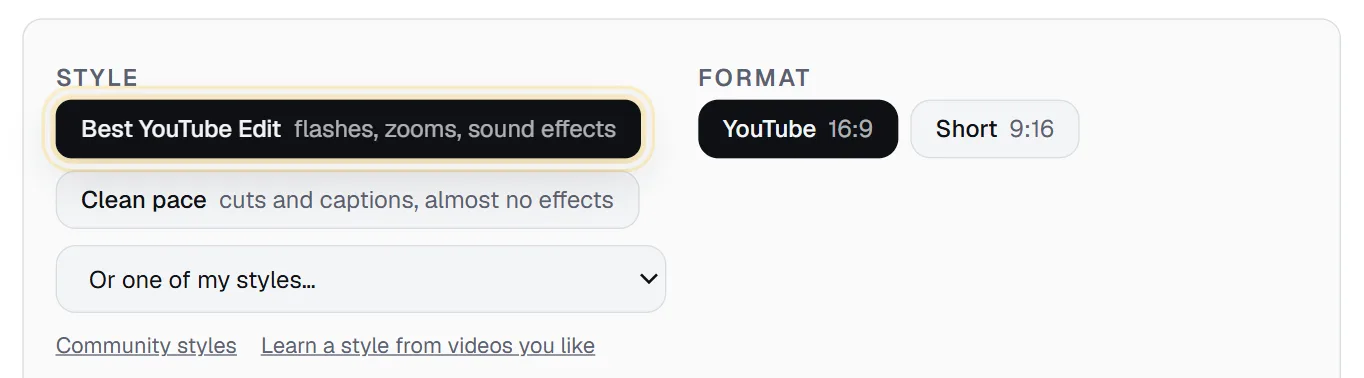
- Pick the Best YouTube Edit style and a bold caption style such as Beast.
- Leave the music on Pick a fitting track for me and click Edit the video.
A quick note before we start: this is a breakdown of a well-known editing style, the fast, loud, high-retention look many big YouTube channels use. It is not affiliated with or endorsed by MrBeast, and it doesn't use his footage. You apply the style to your own videos.
Most guides on this topic teach one thing (usually the caption font) or tell you to build every zoom and sound effect by hand in an editor. Here we go through all five ingredients, why each one works, and how to get them without spending a weekend on the timeline.
The 5 ingredients of the MrBeast edit
- Pacing: dead air is gone and the picture keeps changing.
- Zooms and sound effects on every beat: punch-ins, snap zooms, whooshes and impacts.
- Music that follows the energy: it rises in the hype, drops out before the big line.
- Captions with few words, huge and high contrast, so the video works on mute.
- Something to look at besides the face: text, numbers, emojis and cutaways.
Every one of these serves the same goal: give the viewer no moment where leaving feels natural.
Pacing: why something changes every second
The core of the style is that the viewer never waits. There are no pauses between sentences, no "so, um, today...", and the shot changes before the eye gets used to it.
You can get most of the way there without a single creative decision:
- Cut every pause. Auto edit cuts every silence of 0.7 seconds or more down to a short breath and removes "um" and "uh".
- Cut the retakes. If you stopped and said a line again, only the last take stays.
- Change the framing often. Each cut gets a punch-in (a tighter framing), so a jump cut looks like a new camera angle instead of a glitch.
How often is "often"? With Best YouTube Edit, something changes on screen every 7 to 10 seconds on average, and faster in the heated parts of your talk. If you want it even faster, the Hyper style (available through the API, see below) gives a new framing every 4 seconds with harder punch-ins. Be honest with yourself here: the big channels also cut between multiple cameras, locations and B-roll every second or two. An automatic edit of one person talking to one camera won't match that, but it gets the feel: no dead air and constant motion.
Zooms and sound effects on every beat
The second ingredient is emphasis. When something matters, the edit makes it impossible to miss:
- Snap zooms and slow push-ins on the strongest lines.
- A white flash or a whip (the new part slides in with motion blur) between parts of the video.
- A whoosh on transitions, an impact and a riser on reveals.
- A shake on impacts.
- Keywords, numbers and names popping up big as they are said, and a 3D emoji now and then where it adds feeling.
In Best YouTube Edit all of these are on. The sound effects are mixed well under your voice, which is the part people get wrong when they do it by hand: a whoosh that's louder than the speech gets tiring after the third one.
The edit finds the moments by reading the transcript. It marks the lines that open a new part, the strongest and most quotable lines, the sentences that reveal a result, a number or a turn, and the moments where something works. Zooms, flashes and sounds land on those, not at random.
Music that follows the energy
This is the ingredient that separates a "fast" edit from a good one, and the hardest to do by hand. The music in these videos is not one track at one volume. It builds in the hype, it softens when the story gets serious, and it cuts out for a beat right before the big line, then hits again.
Renderster's Auto edit has an editing director that does this. Before it cuts anything, it reads what you say and how you say it (how loud and how fast, sentence by sentence) and decides:
- The mood of the music, by how you speak, not by topic. A heated rant gets heavy rock or phonk; excited hype gets electronic or pop; calm advice gets calm music; a sad story gets piano. It picks from a free library of instrumental tracks in 18 moods.
- The energy of each part (low, mid or high). The music gets louder in the heated parts and softer in the calm ones, and the framing changes faster when the energy is high.
- When the music comes in. If the video opens quietly, the music arrives with the first strong line instead of from second zero.
- The drops. Right before a punchline, a reveal or the turn of a rant, the music cuts out for a beat, so the line lands in silence, then the music comes back a little louder.
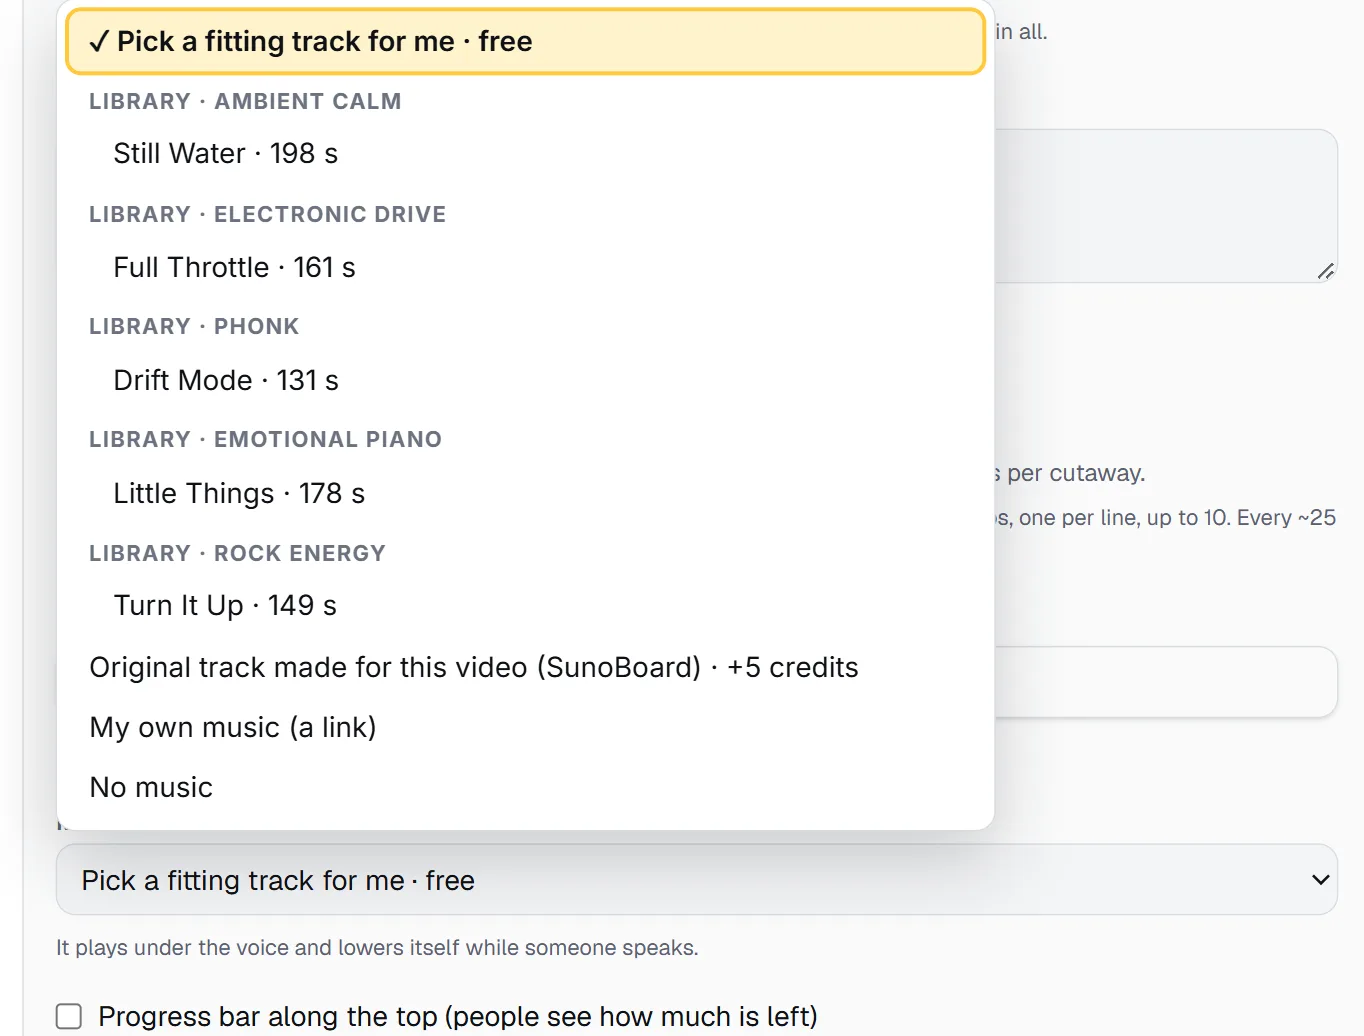
You can override it. The Music dropdown lets you pick a library track yourself (listen first), order an original track made for your video (+5 credits), paste a link to your own music, or turn music off. Whatever plays, it lowers itself while you talk.
The auto edit example on Renderster's Studio page shows the whole recipe on a raw phone video: the director read it as a rant, chose rock, and added animated cutaways in the Hyper style. No person edited it.
Captions: few words, huge, high contrast
Captions in this style aren't subtitles. They are part of the picture: two or three words at a time, a heavy font, bright colors, the current word highlighted, often bouncing.
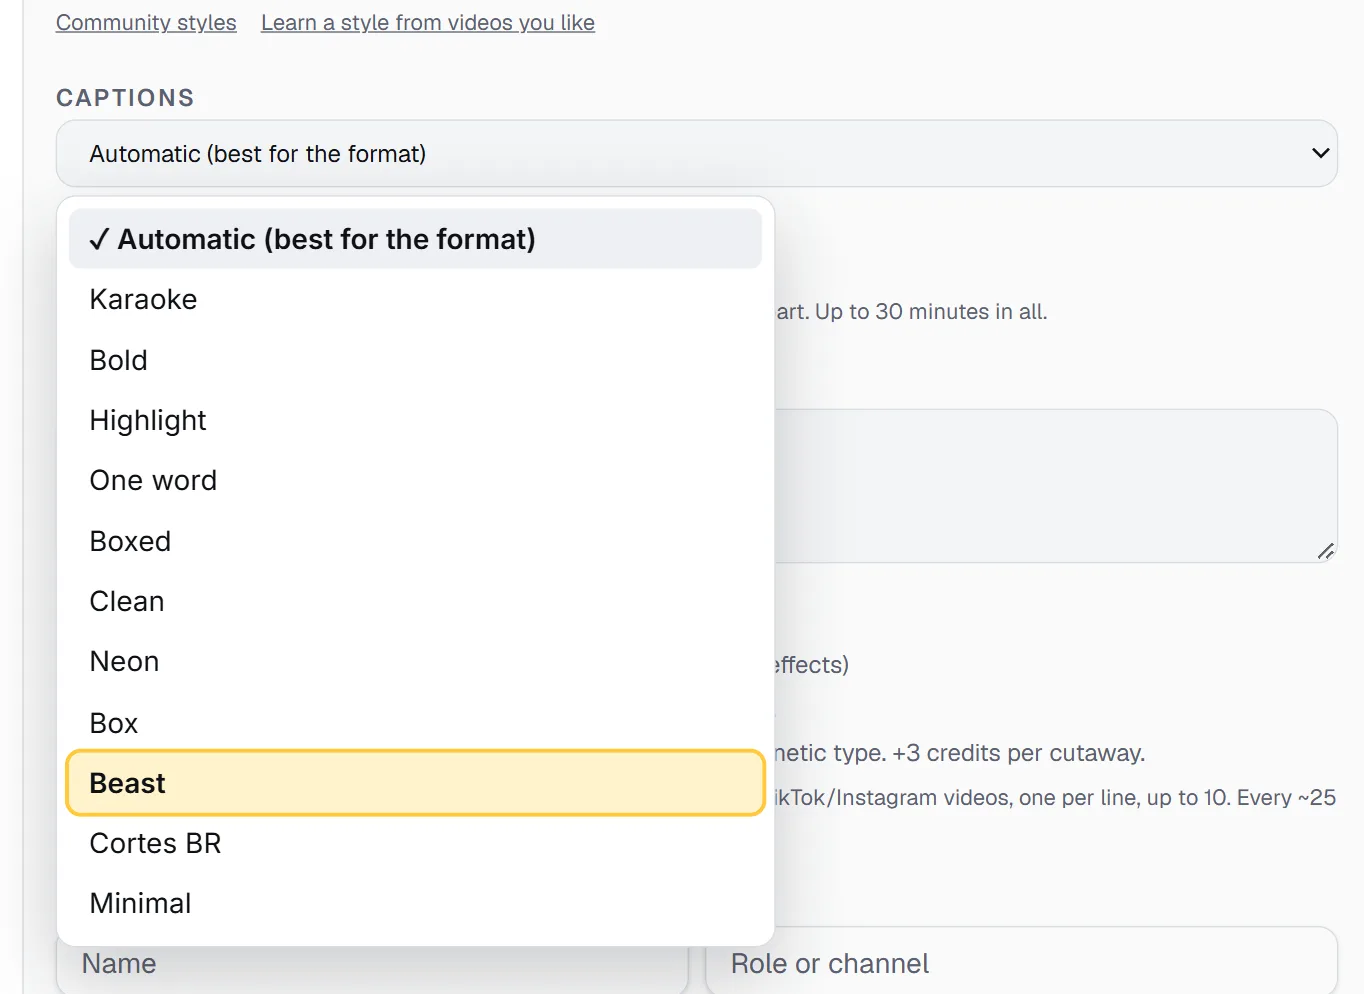
In the Captions dropdown of Auto edit you'll find, among others:
- Beast: two huge words at a time in a cartoon font, the spoken one bouncing in yellow, green or red, each line slightly tilted.
- Bold: heavy, wide captions; the spoken word bounces and only key words light up (numbers green, a "no" red). It's the default for vertical videos.
- Box: the spoken word on a yellow marker.
Two practical rules:
- Keep them in the safe zone. Under More options, Caption position defaults to Safe zone (recommended), clear of the buttons TikTok, Reels and Shorts draw over the video.
- Spell names right. Add names and brand words to Names and words in the video (optional) so the captions write them your way. A misspelled name in giant yellow letters is the fastest way to look amateur.
Doing it in one click (step by step)
1. Upload the video
Open the Media page, paste a link or switch to Upload (MP4, MOV, WebM, MP3, up to 2 GB), and pick Auto edit under What do you want?. Videos up to 30 minutes; up to 10 videos can be joined as one with + Add another video.
2. Pick the style and format
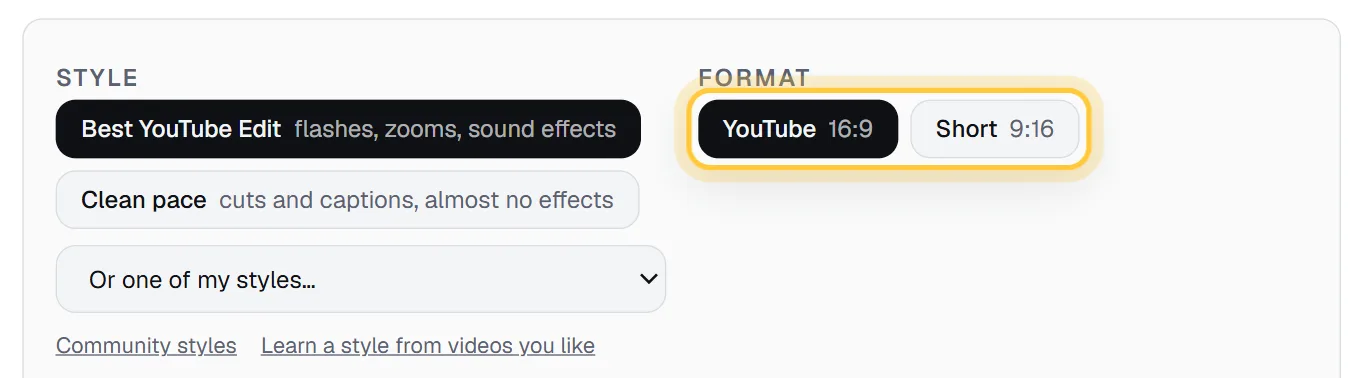
Choose Best YouTube Edit under Style, and YouTube (16:9) or Short (9:16) under Format. In 9:16 the framing follows your face as you move.
3. Captions, music and cutaways
Pick Beast or Bold under Captions, leave Music on Pick a fitting track for me · free, and, under B-roll (optional), either paste up to 10 links of your own or choose Animations made for your video (big numbers, icons, charts, kinetic type; +3 credits per cutaway). The details are in how to add B-roll automatically.
4. Edit and review
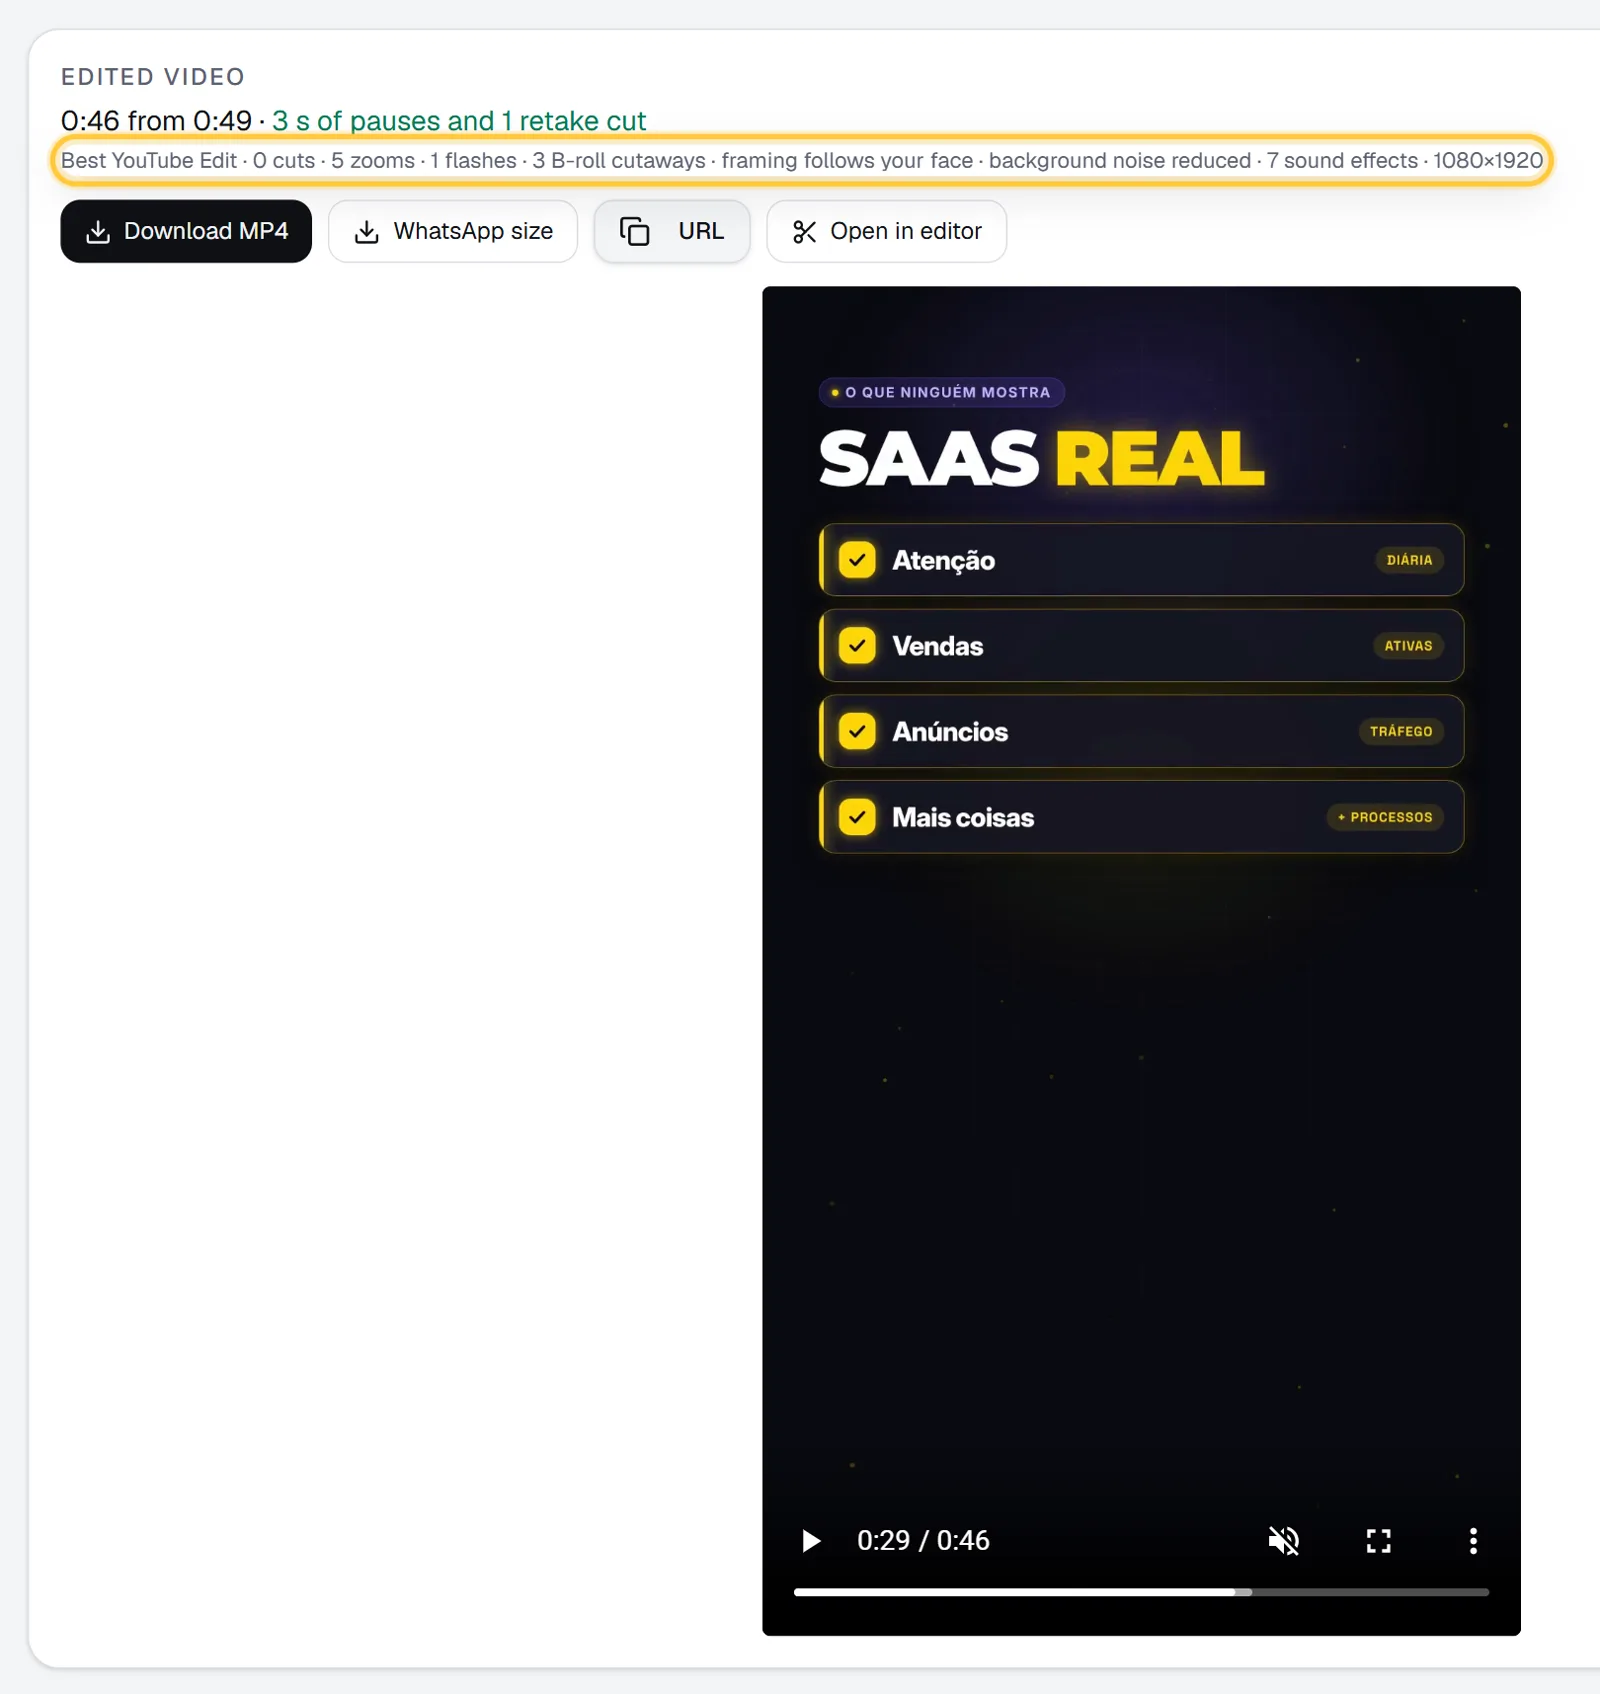
Click Edit the video. On the job page, the Edited video card shows the video and what was done: seconds of pauses and retakes cut, cuts, zooms, flashes, cutaways, keywords on screen and sound effects. The Logs tab has the director's reading: the mood it chose, where the music comes in and how many drops.
Want it even faster? Use Hyper
The Hyper style is the most energy without stock footage: a new framing every 4 seconds with harder punch-ins, whips and flashes between parts, shakes on impacts, emojis, keywords popping up and lots of sound effects. It is made for Shorts, Reels and TikTok, and it's available through the API with "edit_style": "hyper":
curl -X POST https://renderster.com/media \
  -H "X-API-Key: YOUR_API_KEY" \
  -H "Content-Type: application/json" \
  -d '{
    "url": "https://example.com/my-video.mp4",
    "type": "auto_edit",
    "options": { "edit_style": "hyper", "orientation": "vertical", "caption_style": "beast", "music": "auto", "motion_broll": true }
  }'
You can also teach it a pace you like: Learn a style from videos you like takes 1 to 3 videos edited the way you want and measures how they are cut (pace, punch-ins, flashes, captions, energy). Only the editing pattern is saved, never the content. Use your own videos, or videos you have the rights to study.
What it costs
Auto edit is 3 credits per started minute of the edited video. An 8-minute video comes out to 24 credits, about US$1.16 on the Starter plan (US$29 for 600 credits). The pauses cut don't count, because you pay for the edited length. Animated cutaways add 3 credits each; an original music track adds 5. The library music, stock clips and all the effects are included. Auto edit is in the paid plans, and each starts with a 7-day free trial with 100 credits.
When NOT to use this style
This edit is built for attention, and attention has a cost. Skip it, or use Clean pace instead, when:
- You teach something step by step. Flashes and whooshes compete with the information. A course or a tutorial reads better with clean cuts and captions.
- The topic is serious or personal. Grief, health, money trouble: an impact sound on a sad line feels wrong.
- Your audience is B2B or technical. Buyers want clarity and trust more than hype.
- The video is long and calm on purpose. A 30-minute conversation edited like a 30-second hook is exhausting.
How to edit a talking-head video with AI compares Best YouTube Edit and Clean pace side by side.
FAQ
What makes MrBeast's editing style so effective?
It removes every reason to leave: no pauses, a visual change every few seconds, emphasis (zooms, sound effects, text) on every important line, music that follows the energy, and big captions that work on mute. Each of these keeps attention for a few more seconds, and together they add up to high retention.
Can I edit like MrBeast on my phone?
You can do it by hand in a phone editor, but it means placing every zoom, sound and caption yourself. With Renderster you can upload from your phone browser, pick Auto edit and Best YouTube Edit, and get the finished video back, including a smaller "WhatsApp size" copy when the video is large.
What font does MrBeast use for captions?
We can't speak for his team, and a font alone doesn't make the look. What matters is two or three words at a time, a very heavy font, high contrast and the current word highlighted. Renderster's Beast and Bold caption styles are built on that idea.
How do I add sound effects to every zoom automatically?
Use Auto edit with the Best YouTube Edit or Hyper style. It places a whoosh between parts, an impact and a riser on reveals, and shakes on impacts, all mixed under your voice. Clean pace keeps sound effects to the title only.
Does the AI choose the music for me?
Yes, if you leave Music on "Pick a fitting track for me". An editing director reads how you speak and picks a mood from the free library, decides when the music comes in, raises and lowers it with the energy of each part, and drops it out for a beat before your strongest lines.
Is this the same as copying someone's videos?
No. You apply an editing style to your own recording. Nothing from another creator's videos is used, and "Learn a style" saves only the editing pattern (pace, zooms, captions), never the content.